Lab 0
Where to find the course software
We will be working with an emulated DE1-SoC Computer System for the labs. Navigate to http://ecse324.ece.mcgill.ca/simulator/?sys=arm-de1soc for the emulator. The page at that address should look like the image below.
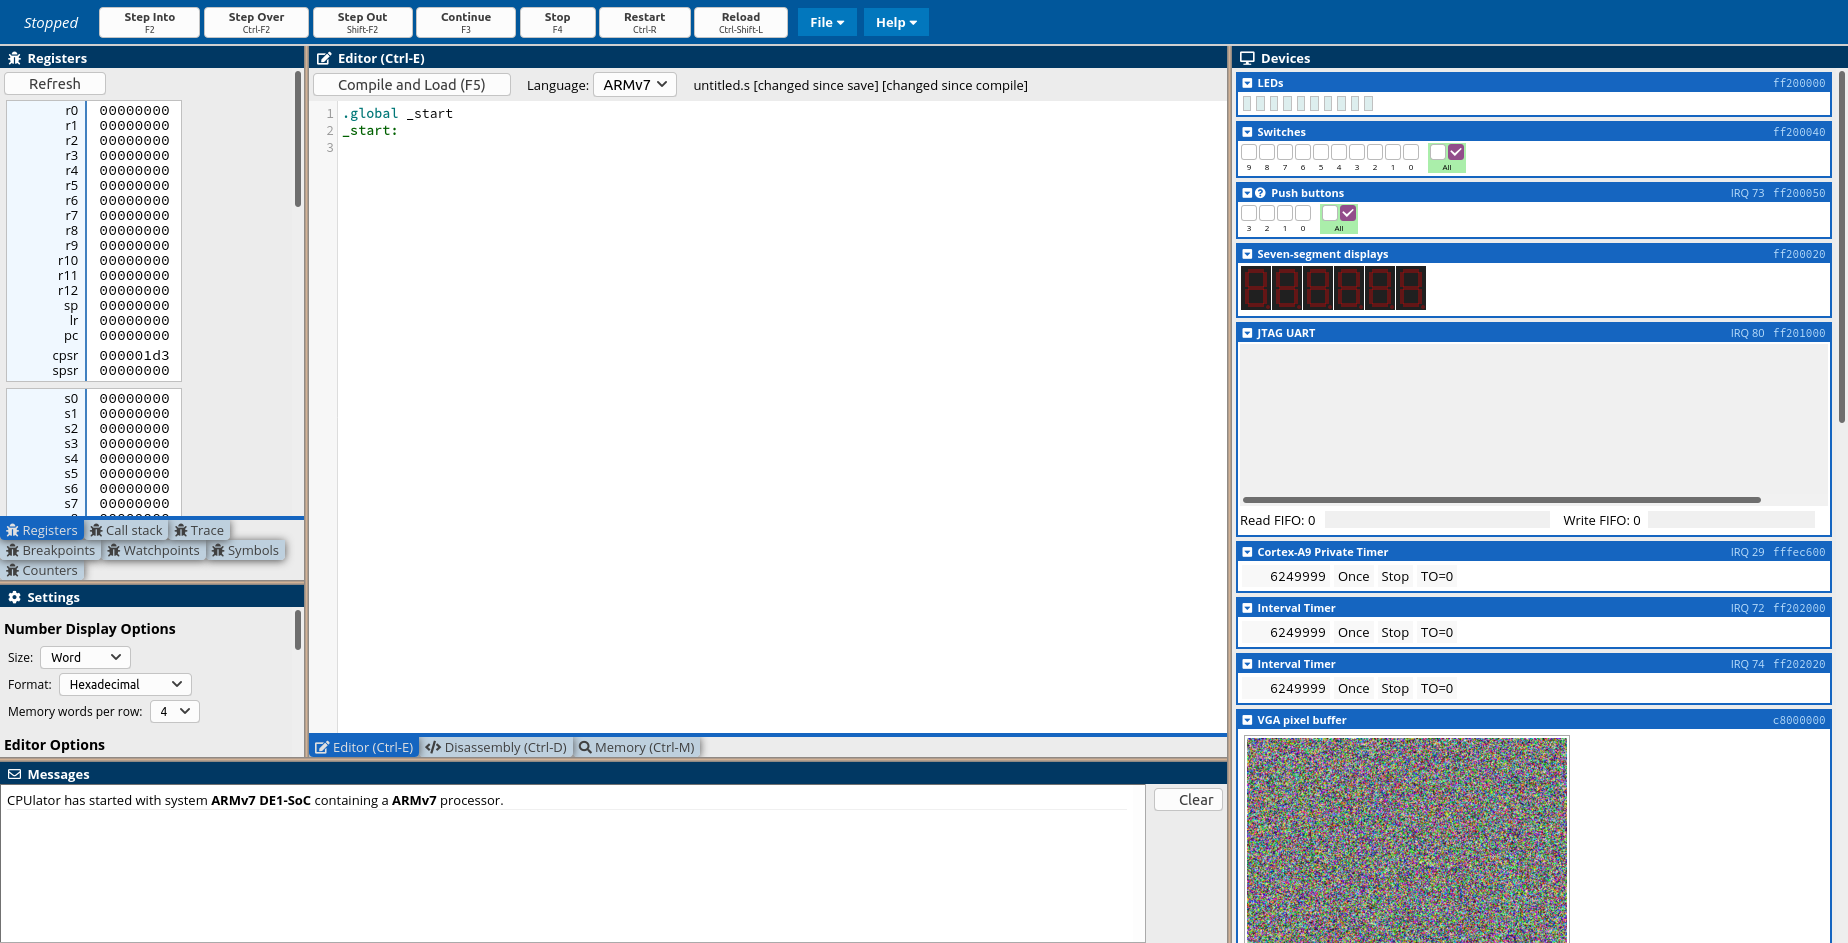
The emulator features a number of different screens. In this lab, we will focus on the editor (open by default in the middle of the screen), the registers (to the left of the editor), and the memory view (accessible by clicking the “Memory (Ctrl-M)” tab at the bottom of the editor).
As you progress through the lab, we recommend that you save your assembly code by clicking the “Save” button that can be accessed from the “File” menu in the application bar at the top of the page. Alternatively, you can use the Ctrl-S keyboard shortcut to save your code into another file/editor.
Asking for help
If you have trouble getting the emulator to work or if you have any issues at all completing the tasks in this lab, we encourage you to ask a TA for help. Likewise, if you have any questions about the lab or the material it covers, we’re here to help. You can ask questions during the live Zoom session or—in case you missed it or have more questions—you can post your questions on Piazza.
Inspecting the default program
Initially, the emulator’s editor screen will contain the following assembly code:
.global _start
_start:
_start: defines a label called _start, our program’s entry point.
The .global _start directive marks _start as a global symbol,
meaning that _start is visible even outside of our code;
by default labels are local to our code. For our purposes, this means that if
_start is global then the emulator will start program execution at the
_start label. Otherwise, it will start program execution at the first
instruction in our program.
In this particular case, the _start label
is at the top of the file, so removing .global _start will not
influence program behavior. This is not always the case. If
_start is placed anywhere else than the start of the file, failing
to mark it as global will affect program behavior. We recommend that you
always mark _start as global.
Running a simple program
The code the emulator gives us by default does not do much. It introduces an entry point for our program, but includes no instructions. Let’s fix that.
We will write a program that reads a value from a fixed address in memory,
adds four to it, and writes it back to that address. That is, we will write
an assembly program that is equivalent to this C code: *address += 4,
where address is some constant address.
In ARMv7 assembly, that looks like so:
.global _start
_start:
  mov r0, #0x100
  ldr r1, [r0]
  add r1, r1, #4
  str r1, [r0]
The four instructions in our program accomplish the following tasks:
mov r0, #0x100moves constant integer0x100into register zero (r0). The#0xprefix indicates a hexadecimal number.ldr r1, [r0]loads the value stored at the address inr0and places the resulting value in registerr1.add r1, r1, #4addsr1’s value to constant integer 4 and stores the result inr1.str r1, [r0]storesr1’s value at the address identified byr0’s value. That is, it stores the result of our computation in memory at address0x100.
Executing the program
All that remains to be done here is for us to run the program. Click the Compile and Load button at the top of the editor to compile our program and place it in our emulated machine’s memory. The editor should automatically switch to the disassembly view, showing our program’s instructions in memory. Open the memory tab to see the contents of the emulator’s memory as raw hexadecimal numbers.
At this point, the machine’s memory should look like the image below.
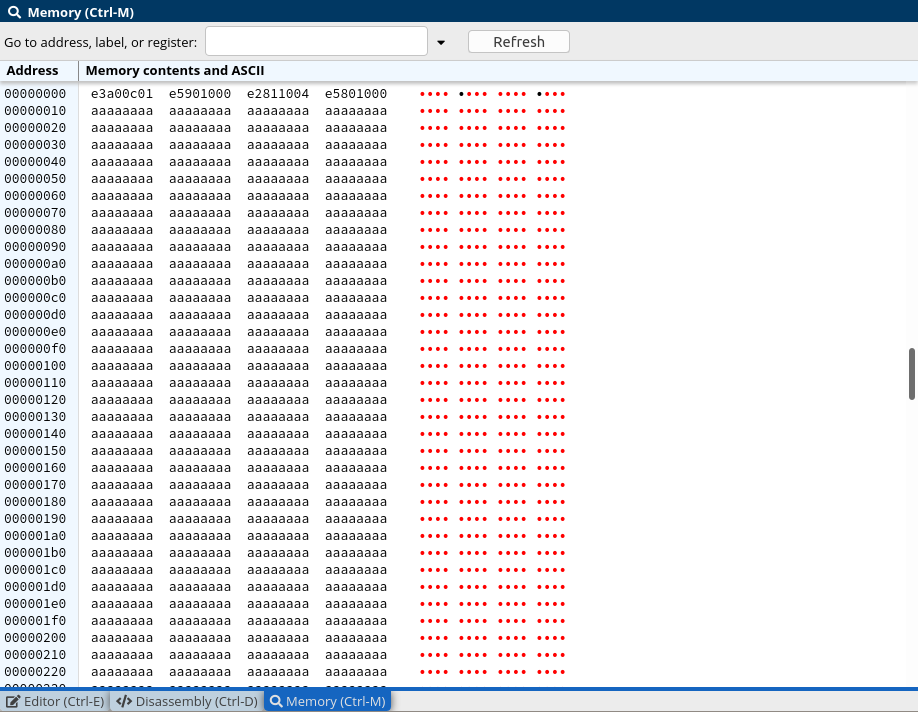
The emulator has filled our memory with the value 0xaaaaaaaa, except
for the first few addresses, in which our program now resides. Our program
is designed to update address 0x00000100, which is now
0xaaaaaaaa.
One way to run the program until completion is to press the Continue (F3)
button on the application bar at the top of the page. Go ahead and do
that now. Address 0x00000100 will now be updated to
0xaaaaaaae (= 0xaaaaaaaa + 4).

Similarly, running the program will have changed our register file.
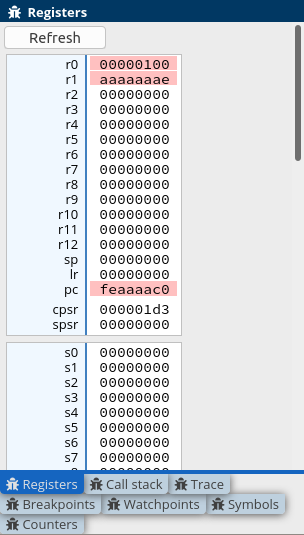
r0 has been set to 0x00000100 by our mov r0, #0x100
instruction and r1 has been assigned value 0xaaaaaaae by
ldr and add.
Running our program has also changed the value of the pc
(program counter) register, which keeps track of which instruction will be
executed next. Every time a non-control instruction is executed, the program
counter is incremented by 4, the size of an instruction in bytes. This
corresponds to moving on to the next instruction after the previous
instruction is executed. Control instructions can change the program counter
in arbitrary ways, but so far our program consists of non-control instructions
only.
The other registers in the register file remain untouched.
Stepping through the program
While running programs to completion can often be convenient, sometimes we want to inspect the state of our emulator as we execute the individual instructions in our program. We can do so by stepping through instructions using the Step Into button on the application bar at the top of the page.
First, go back to the editor menu and click Compile and Load again. This will send us to the disassembly menu, which should look like the following image. Scroll to address zero if the disassembly menu does not show that address already (like in the screenshot).
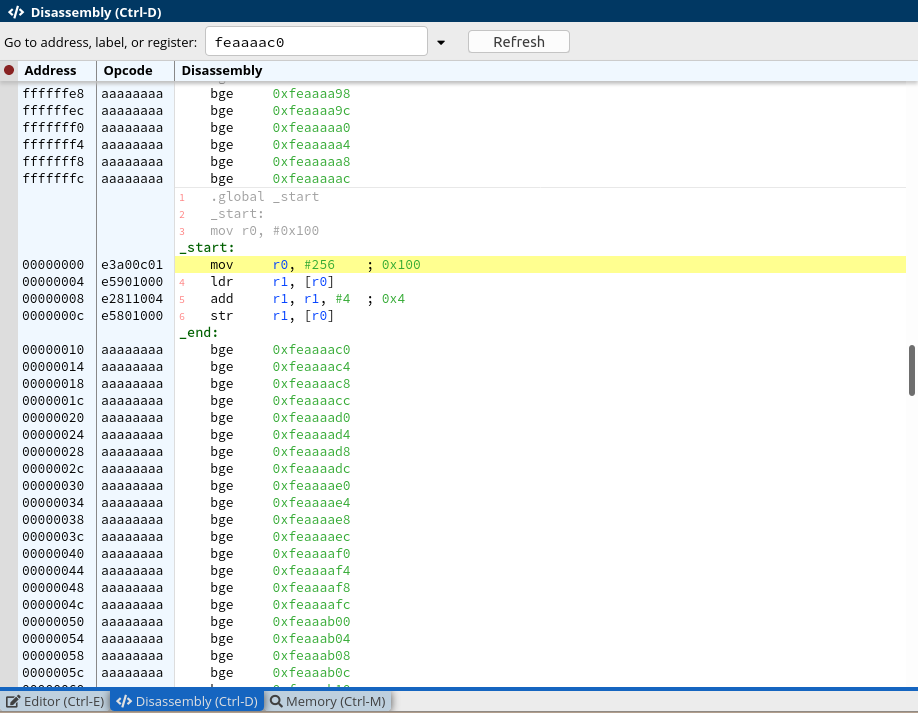
Run one instruction at a time by repeatedly pressing the Step Into button
to run the currently highlighted instruction and proceed to the next one.
As you step through the program, observe how the register file changes with
each instruction. The mov instruction will set r0’s value;
all other instructions will operate on r1. Every instruction will
update the pc (program counter) register.
After stepping through all instructions, go back to the memory tab and
inspect the value stored at address 0x00000100. If you ran this
lab in a single emulator session, the value at that address is now
0xaaaaaab2 (= 0xaaaaaaaa + 4 + 4). This is because the
emulator does not reset the contents of its memory after compiling and
loading your program.
Exercises
After following the instructions above, complete the following exercises and observe the effect on the memory and/or registers content. Remember to save your code into different files as you complete these tasks so you don’t lose your progress.
Change the address that we read and write to an address of your choice. Pro tip: Be careful not to overwrite the program in memory! Since our program consists of four instructions and gets loaded at address
0x00000000, our program will be stored in memory from0x00000000to0x00000010.Tweak the constant that we add to the value from memory, e.g., change immediate operand 4 to a 7.
Change the temporary registers we use (
r0,r1) to some other set of temporary registers, e.g.,r2andr3.The program we created operates directly on an address stored in a register. The
ldrandstrcan also include a constant offset. For instance,ldr r1, [r0, #0x100]will load the value at the address defined by addingr0to0x100. Change themovinstruction to assign zero tor0and modify theldrandstrinstructions to still refer to the same address as before by changing their memory operands to include an offset. Make sure the program still works.When the emulator reaches the end of our program, it stops executing. We could prevent that by appending an endless loop to our program. Introduce a new label at the end of the program. Below that label, insert a
b(unconditional branch) instruction to jump to the label. The syntax forbinstructions isb label, wherelabelis the name of the label you introduced. Step through the program and verify that the branch will forever branch back to itself. Hint: look at how_startis defined for inspiration on how to define a label. Unlike_start, you do not have to make this label global because it does not have any special significance outside of our program.